

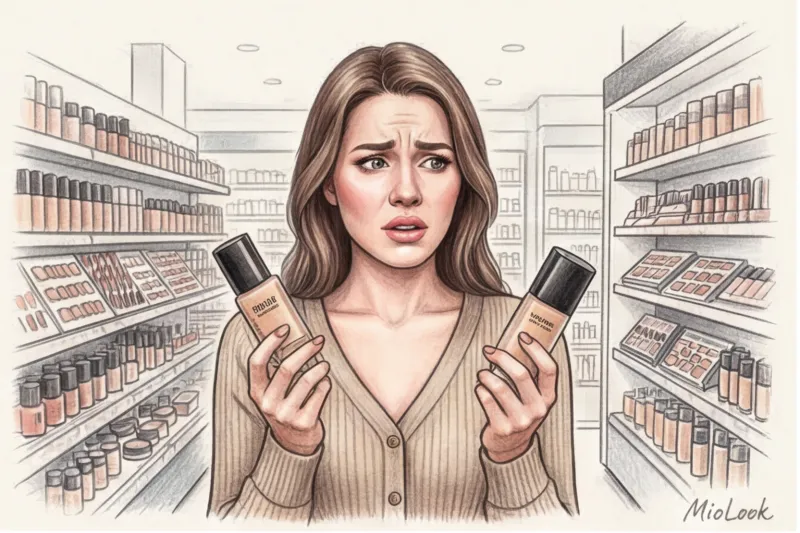
Why You Need to Know Makeup Terms: Marketing vs. Reality
Over the past eight years of working as an image consultant, I've audited hundreds of my clients' makeup bags. And do you know what they all have in common? My personal statistics are relentless: about 40% of jars and tubes are bought by women solely because of a trendy but confusing word on the label. We see a new name, sincerely believe it's an innovation that will finally erase signs of fatigue from our faces, and then we take another 30-50 euros to the checkout. But let's be honest: we need to understand it correctly. makeup terms — this isn't the snobbery of beauty maniacs, but rather your basic financial literacy and the key to a predictable result in the mirror.
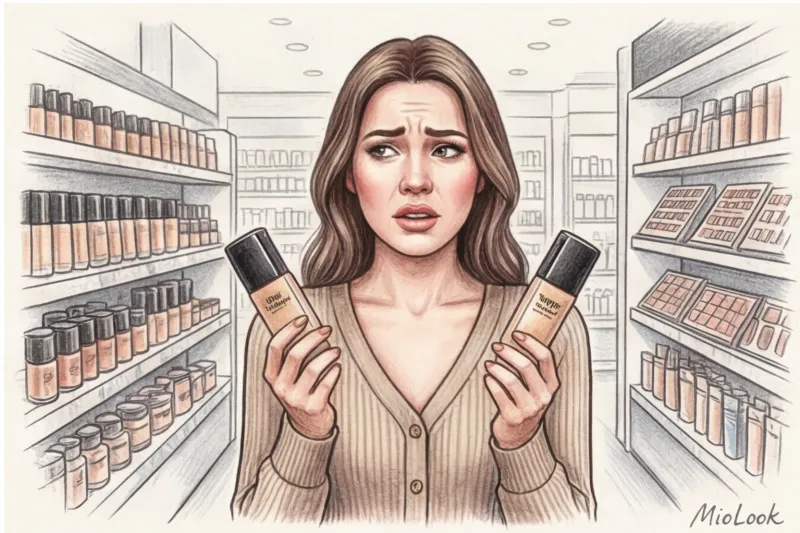
The beauty industry is a gigantic commercial machine that desperately needs to constantly reinvent the wheel. Classic names are no longer enough to get you to buy your fifth lip or face foundation product. That's how new products appear on the shelves. skin tints (skin tints), plumpers (plumpers) and toppers (toppers) Sounds like magic and high technology, right?
In reality, a skin tint is simply a lightweight foundation with a drop of skin-nourishing ingredients, a plumper is a gloss with an irritant like pepper extract or menthol for temporary lip plumping, and a topper is a translucent shimmer applied over your main lipstick. Understanding this terminology instantly saves your budget. You stop buying duplicate products. If you already have a good moisturizing BB cream in your makeup bag, you absolutely don't need a trendy skin tint—they'll give you a completely identical effect on your skin.
It's crucial to distinguish between the actual professional jargon of makeup artists and the marketing hype on packaging. When a makeup artist talks about "base" or "face architecture," they're referring to specific techniques for working with light, shadow, and longevity. But when a brand promises an "innovative HD blur effect" in bold print, it's pure marketing designed to sell you a run-of-the-mill silicone pore filler. I discussed in detail how to choose the right, high-status textures and avoid falling for brand tricks when getting ready for work in my article about business makeup for executives.
As a certified colorist, I constantly encounter another critical mistake caused by confusion in terminology. Manufacturers often confuse the concepts, calling a red, shimmering bronzer a "sculptor." Remember my cardinal rule as a colorist: always separate texture And temperature product.
Texture is responsible for the skin's texture (matte conceals pores, radiant highlights them), and temperature (warm or cool undertone) ensures harmony with your natural complexion and creates volume.
A contour is always an imitation of a natural shadow on the face. A true shadow physically can't be warm and shiny; it's always matte and cool (taupe). If you try to "paint" hollow cheekbones with a warm satin bronzer, you'll end up with shiny, dirty spots on your cheeks rather than a chiseled contour. That's why knowing these terms helps you manage your impressions consciously—we discussed this mechanism in detail in the article about archetype makeup Let's break down this beauty glossary so you know exactly what you're paying for.
Base and Prep: A Glossary of Perfect Skin
Imagine buying luxurious silk for a dress, but deciding to sew it with a rusty needle. The same thing happens when you apply expensive pigment to unprepared skin. Many women invest 60-80 euros in luxury foundations, only to sigh in disappointment: "It highlights all the flakiness and sinks into my pores." The problem is rarely with the foundation itself. More often, it's the lack of the right "canvas."
The importance of preparing the skin before applying pigment is explained by simple chemistry. If you apply foundation to bare skin, the pigment will mix with your natural sebum. As a result, the foundation will oxidize—that is, it will darken or turn reddish within a couple of hours—and the moisture from the cream will be absorbed into the skin, leaving dry, unsightly patches of color on the surface. To prevent this, the beauty industry has created a whole arsenal of preparatory products. Let's translate their names from marketing lingo into layman's terms.
Primers, bases and pore sealers
Primer And Makeup base — They're exactly the same thing. It's a primer that creates a barrier between your skin and makeup. Primers fall into three main categories: matting (contain absorbents that absorb excess shine) moisturizing (works as a light cream, removing tightness) and shining (contains microscopic mica particles that give the face a healthy glow from within).
A completely separate category is Pore filler These are thick, dense silicone-based products (usually dimethicone) that literally fill in the craters of enlarged pores and fine wrinkles, leaving the skin perfectly smooth. The most common mistake I see in my workshops is that people smear the paste over their faces like regular cream.
Silicone textures should never be rubbed in! If you rub them in, the silicone will simply form small pellets. The grout should be gently "trodden" or pressed with your fingertips directly into problem areas (usually the T-zone and cheeks near the nose).
Another important tool in a makeup artist's arsenal is color-correcting bases Here we rely on the Itten circle, a basic tool for any colorist. According to the rules of the color wheel, opposing colors neutralize each other. Therefore, if you have rosacea or active breakouts, you need green base (green cancels out red). And if your face looks tired, sallow, or has a yellowish undertone, it will save you. purple (lavender) base You don't need to apply them all over your face, just to the areas that require color correction.
Foundations: from fluid to cushion
Once the canvas is ready, we move on to evening out the overall tone. And here's where the abundance of jars on store shelves can be overwhelming. Let's break down the main textures by their density.
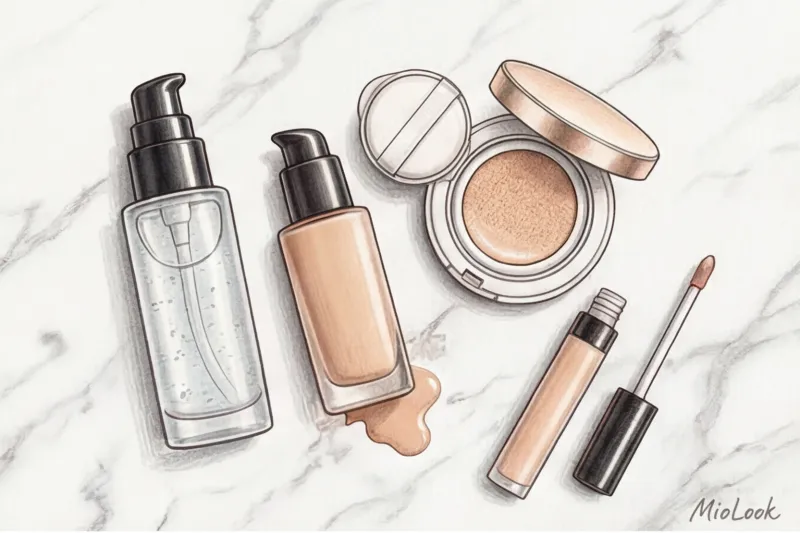
Fluid — This is the lightest, most fluid texture, most often water-based. If you turn the jar upside down, it literally pours out. Fluids are ideal for healthy skin without obvious issues: they only slightly even out skin tone, leaving the face vibrant and mobile.
Here are some famous Asian inventions: BB cream (Blemish Balm) And CC cream (Color Control) What's the difference? BB cream was originally created by dermatologists as a restorative balm after plastic surgery and peels. It's thicker, more nourishing, and effectively conceals imperfections while simultaneously nourishing the skin. CC cream is the next step in this evolution. Its main function is color control. It's much lighter than BB cream and often comes out of the tube white, but it contains pigmented microcapsules that burst as they spread across the skin, adapting to your skin tone.
Now let's debunk one of the main cosmetic myths of recent years. Cushion - This Not A special kind of foundation! It's purely a packaging design. Inside the compact is a porous sponge (the aforementioned "cushion") generously soaked in liquid foundation, BB cream, or fluid. You press the sponge with a special sponge and apply the foundation using patting motions. This format was invented in South Korea to make it easy to touch up your makeup on the go without getting your hands dirty.
As for the fashionable term Skin tint The "skin tint" trend, which is now being actively promoted by glossy magazines, is pure marketing. This name conceals a simple moisturizer with a drop of pigment (a tint is a shade). Brands may charge 30 to 50 euros for a skin tint, promising a "no-makeup makeup effect," but in reality, it's simply a very light foundation with minimal coverage.
Access to MioLook for €0.99 — one-time payment
A smart AI stylist will select the perfect look.
Get access — €0.99 onceConcealer vs. Corrector: The Biggest Makeup Mistake
If foundation is a background filler, then concealer and corrector are spot retouching. And this is where 8 out of 10 women make a critical mistake, confusing these two products. Although they are often placed on the same shelf in stores, their functions are diametrically opposed.
Concealer — is a lightweight, often light-reflecting product. Its shade should match the color of your foundation or be a half-tone to a shade lighter. The main purpose of concealer is highlighting shadow areas (nasolabial folds, corners of the mouth, under-eye hollows) and lightly conceals minor imperfections. Its flexible texture doesn't settle into fine lines.
Corrector — This is heavy artillery. It's a dense, highly pigmented, dry product. Concealers are often colored (peach, salmon, green) and are applied strictly locally, spot-on. They cover serious problems: bright spots, age spots, spider veins.
The power of color is most evident when concealing dark circles under the eyes. One of my clients once complained, "I bought the most expensive light concealer, I apply it under my eyes, and the circles turn gray, and I look like a panda!" This is a classic mistake. A dark circle under the eye has a blue-violet undertone. If you apply a light beige pigment over the blue, you'll get a sallow gray hue.
To hide pronounced dark circles, you don't need a light concealer, but peach or salmon concealer The orange pigment neutralizes the blueness (remember the Itten circle again). You apply a microscopic drop of peach corrector precisely to the bruise, pat it in, and only then, if necessary, lightly apply a light concealer in your skin tone. If you're unsure of the exact undertone of your bruises and what shades of corrector you need, you can upload a photo of yourself without makeup to MioLook — algorithms will help determine your contrast and skin temperature to select the ideal concealer palette.
Facial Architecture: Contouring and Color Terms
In academic drawing classes, the first thing students learn is the laws of chiaroscuro. As someone with an artistic background, I always tell my clients: facial makeup isn't just painting skin according to a template; it's true architecture. Facial products literally change its proportions, creating the illusion of hollows where there aren't any and adding volume where it's lacking.
In the 1990s, legendary makeup artist Kevyn Aucoin brought rigorous theatrical modeling techniques into everyday life. He demonstrated that skillful use of light and shadow can visually shorten a high forehead, narrow the bridge of a nose, or sharpen a sagging facial contour. The key principle here is based on basic optics: light and shiny colors always visually bring objects closer and enlarge them (creating volume). Dark and matte colors create distance, concealment, and depth.
Sculpting, bronzer, and highlighter: don't mix up the temperature
Let's take a look at the three main tools of "plastic surgery" without a scalpel. Beauty brands often slap these terms on makeup packaging without thinking, which creates chaos in cosmetic bags.
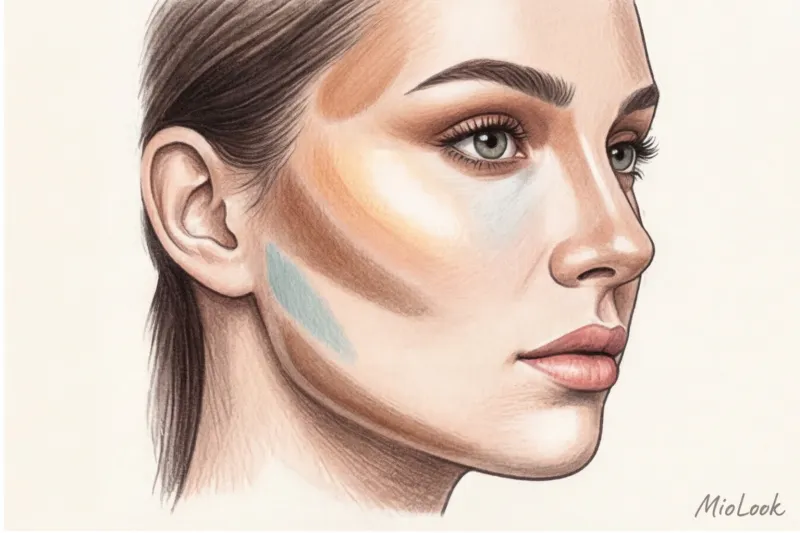
Sculptor — This product is designed to mimic natural shadows on the face (under the cheekbone, along the jawline, in the crease of the eyelid). Go to a window with a mirror and look at the shadow of your chin on your neck. Is it red? No. It's a natural shadow on human skin. Always It has a cool or neutral taupe, sometimes with a slightly olive undertone. Furthermore, the sculptor must have a strictly matte texture. According to the laws of physics, shadow cannot reflect light! A prime example of the right shade is the famous Fenty Beauty cream stick in Amber (costing around €35).
Bronzer — This is a story about the sun-kissed effect. Its purpose is to imitate a light tan and a rested look, not a sun-kissed sun. Therefore, bronzer always has a warm undertone: reddish, terracotta, caramel, or golden. Unlike bronzer, bronzer is applied with a fluffy brush to the high points of the face that tan first in the sun: the upper forehead along the hairline, the bridge of the nose, and the apples of the cheeks.
Highlighter — a product for highlighting prominent areas (the top of the cheekbone, the "V" above the upper lip, the inner corner of the eye). In the professional world, we strictly distinguish between types of glow. A subtle glow (satin) creates the effect of well-groomed, expensive, well-hydrated skin without any shimmer—it's an ideal choice for the office. A more active glow (metallic) creates a wet, mirror-like highlight that looks luxurious at evening events, but in daylight will mercilessly highlight even the slightest imperfections and enlarged pores.
The most disastrous makeup mistake I regularly see is trying to contour cheekbones with a warm, shimmery bronzer. By applying a shimmery red product to the hollow under the cheekbone, you're not creating a shadow. You create the effect of a dirty, puffy spot, which visually lowers the cheek and breaks the entire architectural logic of the face.
Blush: tints, sticks, and baked textures
Once the relief is created using light and shadow, the face needs to be restored to its freshness. And here, the industry offers us a whole range of textures, each of which solves its own specific problem.
Tint — is a liquid product, similar to colored water or a light gel, extremely pigmented. Its main feature is hidden in the name (from the English stain — a stain): it doesn't sit on top of the skin, but literally penetrates the top layer of the epidermis. The tint provides phenomenal staying power. Few people know that the world's first tint (the legendary Benetint by Benefit) was created in the 1970s specifically for exotic dancers who needed a permanent flush. You can swim in the sea or wear a thick mask with the tint—it will stay in place. But there's a catch: the product sets in seconds, so blending it out requires lightning speed.
Cream blush and sticks - best friends for creating the effect of dewy, youthful skin (in the English-speaking community this is called dewy skin ). They melt with the warmth of your fingers, blend seamlessly with your foundation, and don't accentuate fluff or flaking at all, unlike dry powders. They're an absolute must-have for dry, dehydrated, or aging skin.
If you often experiment with creamy textures and are wary of overdoing it, I recommend digitizing your successful looks. In the app MioLook You can create a visual database of your makeup looks: upload photos of successful days and note which combination of blush and contour worked best for your face shape. This is a huge time-saver in the morning.
Baked textures This isn't a marketing gimmick, but a real, complex production technology. Liquid pigment with added light-reflecting particles and caring ingredients is poured onto special terracotta tiles and slowly baked in ovens at a specific temperature (this is exactly how the famous MAC Mineralize blush or Hourglass products, which average around €35-45, are made). As a result, the water evaporates, and the product acquires a silky, weightless texture. Baked blush doesn't dust when applied to the brush and always imparts a very subtle, "expensive" glow to the skin, as if illuminating the face from within.
Eye Makeup: From Base to Pigments
Opening a modern eyeshadow palette—say, one from Natasha Denona or Anastasia Beverly Hills, priced at €60-70—can be overwhelming. There are fifteen refills, and not one finish is identical. The terminology of eyelid and eyelash products has evolved far beyond the basic concepts of "shadow" and "pencil." To ensure your makeup doesn't crease in the crease after two hours and is appropriate for the occasion, you need to clearly understand the physics of each texture.
As a colorist, I always point out to my clients that the same shade (for example, peach) will behave completely differently on the skin in different textures. Light refracts differently, altering the perception of volume and even color temperature.
Eyeshadow textures: shimmer, satin, matte, glitter
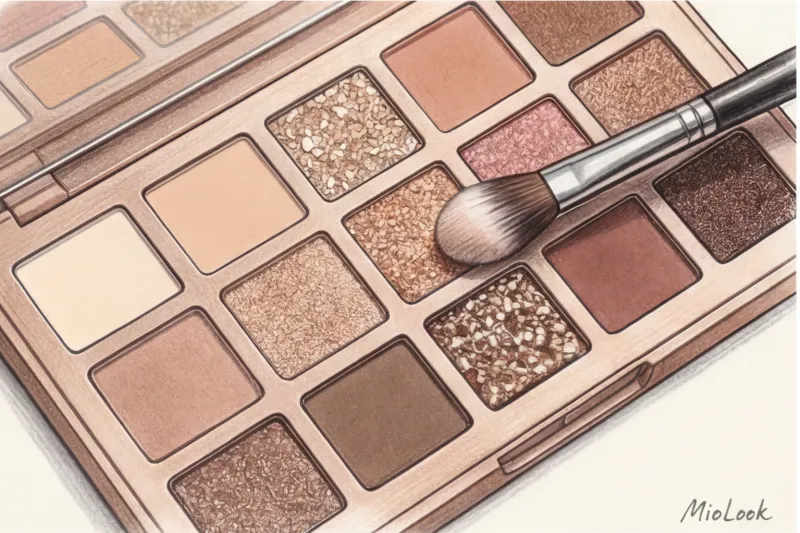
Let's break down the contents of any professional palette by finish category. These aren't just marketing terms, but direct instructions for use.
- Matte: Eyeshadows without a hint of shimmer. They absorb light rather than reflect it. They're your foundation. Matte textures are ideal for shaping the eye, darkening the outer corner, and defining the crease. Without a matte base, any shimmery makeup will look flat.
- Satin: The golden mean. They impart a delicate, luxurious glow without any noticeable shimmer, reminiscent of the shimmer of silk fabric. I highly recommend satin textures—along with matte ones—for formal makeup. They don't accentuate skin texture (which is crucial for age-appropriate makeup) and look classy under harsh office lighting.
- Shimmer: A pronounced shine with fine, shimmering particles. Save shimmer for evening wear, dates, or special occasions. In daylight, intense shimmer often looks out of place. Also, it's best to apply shimmer with your fingertips—this allows for better pigment absorption.
- Glitter: Large, free-standing glitter. The key rule that beginners forget: glitter never sticks to a regular base or concealer. It requires a special sticky base—a glitter primer. Without it, by mid-evening, all the glitter will end up on your cheeks.
- Pigment: A pure, loose, concentrated color in jars. This product is for advanced users, requiring precision and "pressing" strokes with a flat synthetic brush.
For anti-aging makeup, I always recommend avoiding any shimmery textures on the hooded eyelid. Glitter visually pushes volume forward, making the hooded eyelid appear even more prominent. Only matte shadows work well in this area.
Access to MioLook for €0.99 — one-time payment
Start creating your perfect look with AI and match your makeup to your wardrobe.
Get access — €0.99 onceEyeliners: kajal, liner, marker
Let's move on to the lash line. When I'm reviewing makeup bags, I regularly see the same thing: girls try to draw a precise, graphic line with a soft eyeliner pencil, and then are surprised by the "panda" effect. Each product has its own area of responsibility.
- Kajal or Kohl: A very soft, bold pencil, designed specifically for lining the waterline and inter-lash line. Its key feature is that it blends easily into a beautiful haze, but it doesn't set completely on its own. If you draw a line on your upper lid with a kajal and don't set it with a matching dry eyeshadow, it will inevitably bleed under your brow within an hour.
- Liner: An umbrella term for liquid and gel eyeliners. Gel liners in glass washers (such as the cult options from MAC or Inglot, which cost around 20-25 euros) are beloved by makeup artists for their flexibility. You have a couple of minutes to adjust the shape with an angled brush before the product sets completely.
- Marker (Felt-tip liner): A felt-tip eyeliner. It comes with a felt tip (a stiffer one, a great choice for those just learning to draw eyeliner) or a brush tip (made of individual bristles, it draws very finely, but requires a steady hand).
A little professional secret: If your dress code is strict, swap out the charcoal highlighter for a deep chocolate, graphite, or plum liner. This will add definition to your look but tone down the overly aggressive look that black graphic eyeliner can have in daylight.
Lip Makeup Terms: Longevity and Volume
If you look through our mothers' makeup bags, you'll likely find only classic bullet lipstick—a traditional twist-up stick with a wax base. But modern lip products have evolved significantly. Today, they feature complex chemical formulas that address specific needs, from visually reshaping the face to providing extreme color hold for 12 hours.
Let's start with the most talked about product - plumper Marketers love to sell us the dream of plump lips without injections, but let's look at things through the lens of ingredients. A plumper is a gloss containing active irritating ingredients: hot pepper extract (capsaicin), a high concentration of menthol, camphor, or even purified bee venom. When applied, they cause a localized micro-burn and a sharp increase in blood flow to the tissue. I hasten to debunk a popular beauty myth: there is no cumulative or long-term plumping effect. This is purely a temporary swelling that subsides within 30-40 minutes, returning the lips to their original shape.
Personal advice from a stylist: I strongly advise against using aggressive plumpers for women over 40. Due to age-related changes in the microrelief of the skin around the mouth (the formation of invisible purse-string wrinkles), the irritating liquid texture easily migrates. The plumper simply disrupts the contours of the lips, seeping into these microreliefs, and instead of sensual volume, you get the effect of sloppy lipstick.
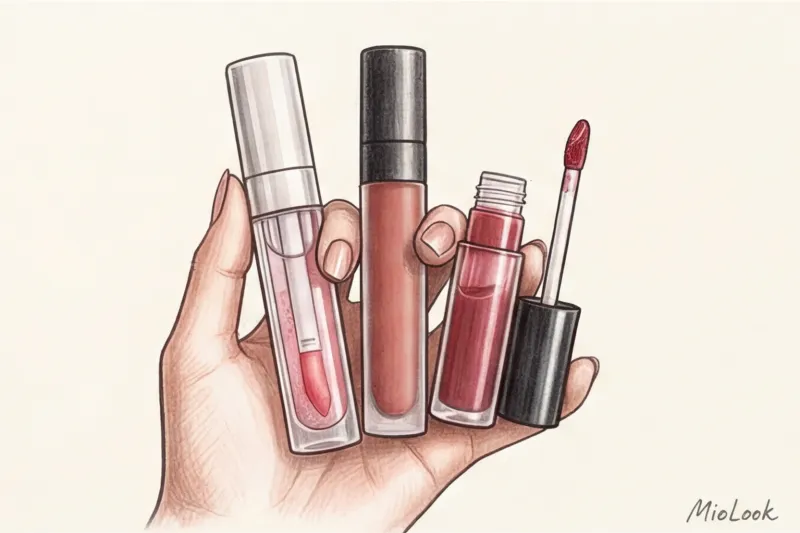
The absolute opposite of wet glosses - Liquid matte lipstick This isn't just a glossy lipstick, but a volatile suspension. Upon contact with air, the solvents evaporate, and the formula hardens, ensuring rock-solid wear. Whether it's a luxury €35 lipstick or a budget find for €10, you can drink coffee or dine with it without worrying about color retention. However, there's a critical requirement: this formula is merciless to skin texture and requires perfect hydration before application. If you apply the drying pigment to dry lips, it will highlight every flake. My protocol: apply a thick, nourishing balm 15 minutes before applying makeup, and then wipe it off with a tissue just before applying lipstick.
But how can you add variety to a dull matte finish if you're bored with it? This is where topper This translucent topper features active glitter, mica, or metallic effects. Its key technological feature is that it was created specifically for application over matte lipstick. Unlike regular gloss, the right topper doesn't contain oils that could dissolve the long-lasting base underneath. It's a brilliant solution for a quick transformation: simply apply the shimmery topper over your morning nude lipstick, and your evening look is complete.
To help you remember which topper goes perfectly with your favorite base lipstick, I recommend taking photos of successful combinations and saving them in MioLook This saves a lot of time in the morning getting ready and prevents you from impulsively buying a tenth similar shade.
Makeup Techniques: Deciphering Makeup Artist Slang
Imagine a typical situation: you sit down with a professional before an important event, show them a reference from Pinterest, and in response you hear: "Great, we'll do a light drape here, and we'll take the eyes into a soft smoky eye with cut-criss." It sounds like a Latin incantation. Understanding professional techniques helps not only to read modern tutorials correctly but also to communicate effectively with your makeup artist so that the result in the mirror matches your expectations. There's nothing more frustrating than paying 100 euros for a professional's work, only to tearfully wipe off the thick foundation with tissues simply because you and the artist understood the word "glow" differently.
Working backstage on film sets, I constantly see a huge gap between stage makeup and real-life makeup. The main problem these days is blindly copying social media trends. What looks perfect through filters and under the powerful ring light of a TikTok ring light often turns into a heavy mask in daylight. Let's examine popular makeup terms through the prism of common sense and wearability.
Baking, strobing and draping
These three terms describe completely different approaches to working with facial architecture and texture.
Baking — This technique originates from drag culture and theatrical makeup. It involves applying an extremely thick layer of loose translucent powder with a damp sponge over a heavy concealer (usually under the eyes, on the bridge of the nose, and under the cheekbone). This "cake" is left on for 5-10 minutes. Chemically, the powder acts as a powerful absorbent: it draws moisture from the foundation, and the skin's warmth literally "bake[s]" the makeup. The excess powder is then brushed off with a fluffy brush.
My professional verdict: baking is terribly drying and ages your skin by at least five years in real life. Powder highlights every single micro-wrinkle you didn't even know you had. This technique is great for the stage, where the spotlights "eat up" half your skin, but for everyday life, it's a disaster.
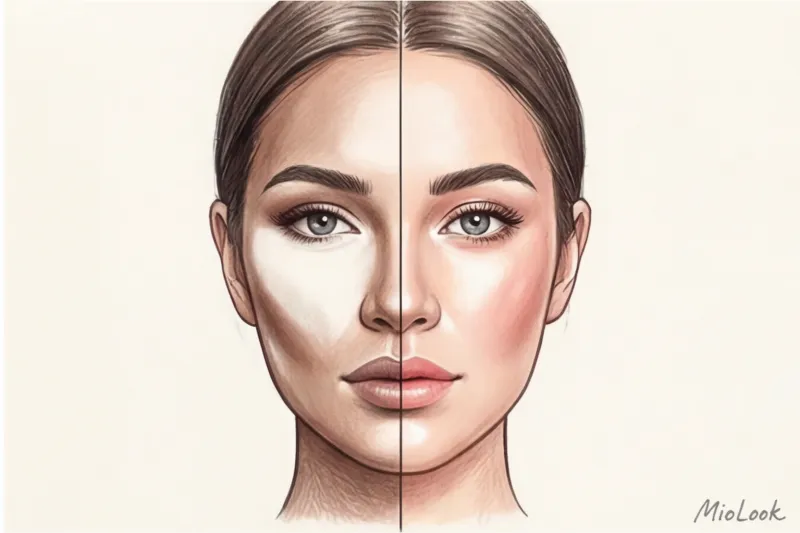
Strobing — the complete opposite of harsh matte contouring. This is a facial contouring technique using only light, i.e., highlighter, without the use of a dark contouring product. The product is applied to all prominent areas: cheekbones, bridge of the nose, the bow above the upper lip, and the inner corners of the eyes. The result is a dewy, fresh, and nourished complexion. Important: if you have active breakouts or enlarged pores in the application area, strobing will accentuate this contouring.
Draping — is facial contouring using blush. The technique is experiencing a major revival, although it was invented back in the 70s by legendary celebrity makeup artist Way Bandi. Instead of applying a taupe shadow under the cheekbone, you contour the face by sweeping the blush from the apples of the cheeks to the temples and even onto the eyelid. For a modern look, I recommend using two adjacent shades: a darker one applied under the cheekbone and a lighter one slightly higher, carefully blending the line.
Your ideal image begins Here
Join thousands of users who look flawless every day with MioLook. Organize your style and save the best beauty references in one place.
Smokey Eyes and Cut-ChrisEye makeup is where the most confusion arises. Many clients are terrified of the phrase "smoky eyes," imagining themselves as the lead singer of a grunge band with smudged black eyeliner.
Smokey eyes literally translated as "smoky eyes." It's important to remember this forever: smooth transition technique Color, not just "black shadow." The main rule of any smoky eye is to apply the darkest, most saturated shade at the lash line and smoothly, without a single sharp line, blend into a light haze toward the brow. Smokey eyes can be delicate daytime (peach or caramel tones), colored (emerald, wine), or classic brown. The secret to a luxurious smoky eye is to use a cream base, which is then set with powdered shadow.
Cut crease — a technique with a clear, graphic cut in the crease of the upper eyelid. First, the eyelid is defined with dark matte shadows, and then the mobile eyelid is "cleaned" with a dense, light concealer. A shimmering pigment is applied over the concealer. The result is a sharp, almost architectural contrast between the dark crease and the light eyelid.
This technique creates a stunning visual opening of the eyes, but requires precise blending skills. In everyday life, a hard cut-criss line often looks too heavy and theatrical. Furthermore, on drooping lids or aging skin with loss of elasticity, this perfectly graphic line will simply break when the eye is open. If you like this effect, ask your makeup artist to soft cut crease (soft cut) where the edges of the concealer are slightly shaded.
To help a professional understand exactly what level of haze or graphic effect you want, words are never enough. I strongly recommend collecting successful visual examples and saving them in the app. MioLook — this way, you can show your makeup artist your mood board in a second and be guaranteed to get the makeup that will highlight your beauty, rather than turn your face into someone else's mask.
Fixation and makeup removal: the final stage
The paradox of the modern beauty industry is that we're willing to spend hours creating the perfect facial architecture, but we completely ignore the chemistry of the processes that set and remove this makeup. Yet it's these two steps that determine how you look at the end of a long day and the condition of your skin the next morning.
Let's start with fixing. If you see flour-white powder in the store, don't be alarmed. transparent powder Its main purpose isn't to impart color, but to work like Photoshop in real life. Thanks to spherical silicon dioxide microparticles, it works like an optical illusionist: it diffuses light, mattifies the face, and bluerite (from the English word "blur" – to blur) pores. It becomes completely transparent on the skin, making it suitable for any skin tone.
Liquid fixatives are another area of total terminological confusion. Brands often slap the words "setting" and "fixing" on their bottles as synonyms, but chemically, they are two completely different product categories:
- Setting spray: Its mission is to eliminate the "over-powdered" effect. It contains moisturizing ingredients (glycerin, algae extracts) that literally fuse layers of makeup (foundation, powder, and dry foundation) into a single, seamless whole. The face becomes vibrant, but this product doesn't prolong the wear of your makeup.
- Fixing spray: It's basically hairspray, but adapted for the face. Its ingredients often include volatile alcohols and acrylic copolymers, which create a thin, invisible film on the skin. This ensures that rock-solid hold for weddings or long events, preventing pigment migration.
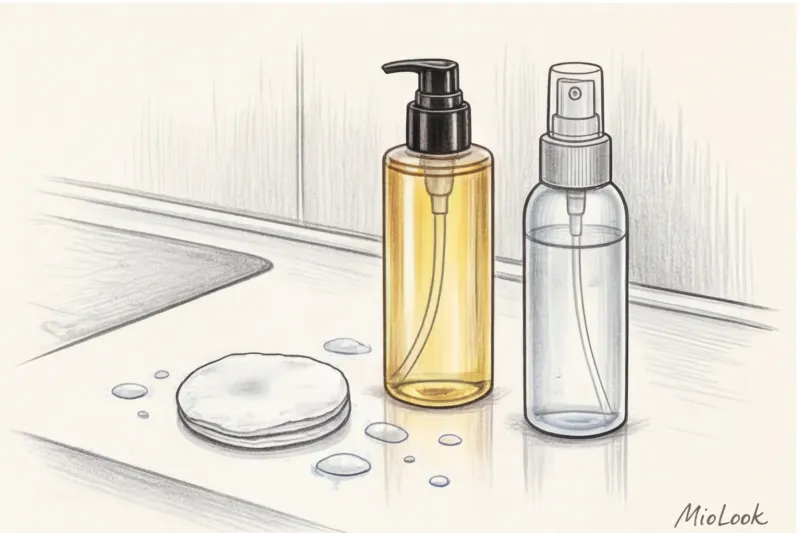
But the most critical stage of any relationship with long-lasting cosmetics is the proper parting. Modern foundations, setting polymers, and sunscreens (SPF) cannot be washed off with regular water or light foam. They are oil-soluble. This is where... hydrophilic oil (Cleansing oil) The "like dissolves like" principle works flawlessly: the oils in the product break down sebum and waterproof pigment. Upon contact with water, the product emulsifies (turns into a white milky substance) and rinses off easily. Golden rule: Hydrophilic oil requires a mandatory second step - washing with a base gel or foam to remove any remaining emulsion.
And now comes the main revelation, the reason I am writing this section. Micellar water — it's a solution with micelles, special magnetic molecules that attract dirt and oil. For years, marketers have been hammering the dangerous myth into our heads: "no rinsing required."
From a cosmetic chemistry perspective, micellar water left on is a ticking time bomb. Micelles are surfactants, or soap. By leaving them on your face, you literally allow the soapy solution to be absorbed into the epidermis.
These surfactants continue to work on the face, slowly but surely destroying the skin's lipid barrier. The result? Dehydration, microcracks, and sudden breakouts, even from a tried-and-true €100 cream. Remember: micellar water must be rinsed off. Always.
By the way, if you notice that your usual makeup is suddenly starting to adhere poorly, flake, or cause irritation, check the expiration dates of your cream products and makeup removers. Their chemical formula changes after opening. To avoid having to remember these dates, I recommend writing down all the jars you buy. MioLook — the app will promptly remind you when it's time to reapply your hydrophilic oil or fixing spray, saving your skin from unexpected reactions.
A stylist's checklist: a basic makeup kit without unnecessary jargon
According to Mintel (2023), the average woman regularly uses only 20% of the contents of her makeup bag. The remaining 80% are impulse purchases prompted by aggressive marketing, beautiful packaging, and a simple misunderstanding of complex beauty product terms. As a practicing colorist, I completely agree with these statistics. We've covered dozens of complex concepts in detail, but the truth is, to create an expensive, high-status look for every day, you don't need a professional makeup artist's arsenal.
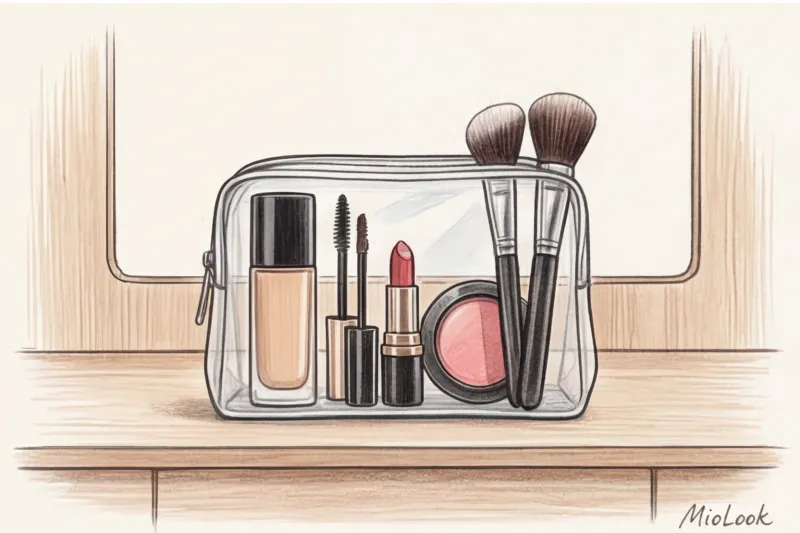
Let's move from theory to practice and put together a functional makeup kit. What do you really need for a business and everyday makeup look so you can get ready in no more than 15 minutes? My gold standard includes just eight items (by the way, an excellent basic set in the mid-market segment will cost you around 90-120 euros):
- Light BB/CC cream or fluid. We need to even out the overall tone, not cover up the vibrant texture of the skin. Products like classic BB creams from Erborian or weightless fluids do a great job of this, adapting to your pigmentation.
- Tone-on-tone concealer. For localized concealment only (vessels along the sides of the nose, subtle shadows in the inner corner of the eye). Avoid extremely light shades—they'll only highlight the micro-relief and create a reverse panda effect.
- Neutral sculptor. A true taupe shade that will gently bring back natural shadows lost by foundation.
- Refreshing blush. Peach, coral, or soft pink shades instantly erase signs of sleep deprivation and make you look younger.
- Mascara And eyebrow gel (transparent or tinted). Two essential tools that define the face and open up the eyes.
- Lip pencil And base lipstick or tint. To create a clear outline and a subtle color accent that complements your natural coloring.
Now, the elimination list. What can a beginner safely avoid to avoid blowing their budget and overloading their skin?
- Forget about primers and silicone pore sealers. A high-quality moisturizer from your basic skincare routine will prep your skin for makeup just as well.
- Leave it color correctors (Green from redness, purple from yellowness) for professionals. Without a deep understanding of color and the skill of fine blending, they will simply create dirty, sallow spots under the foundation.
- Aggressive plumpers with a burning effect, sparkling baked highlighters and crumbling glitters — these are highly specialized products. They look great under the ring lights on TikTok, but in the daylight of an office, they look heavy and out of place.
My main professional mantra: cosmetics should highlight your unique facial structure and natural color type, and not turn a living face into a flat mask based on social media templates.
This principle of minimalism and mindfulness perfectly reflects the philosophy MioLook applications We advocate a smart approach to your wardrobe and overall appearance. The secret to impeccable style lies not in the number of jars you buy, but in their perfect match to your individual parameters. Fewer products, but each one works 100%, precisely matching your skin temperature, contrast, and type.
Learn makeup terms not to blindly buy every trendy new product, but to intelligently filter out marketing noise. By understanding the difference between satin and matte finishes, between contouring foundation and bronzer, you'll begin to consciously manage your look. You'll stop being a victim of advertising and become your own stylist, investing only in what truly brings out your natural beauty.
Guide Chapters
What is nude in fashion and cosmetics: a detailed glossary
What is a facial sculptor: types and application rules
Bronzer: What is it, the main types and application rules
What is a cushion: format features and rules of use
Lip tint: what it is, types, and how to use it
What is a face corrector: types and application rules
What Is Kajal: Definition, Differences, and How to Use It
Learn everything about kajal, from its historical origins to modern application techniques for flawless eye makeup.
Beauty Blender: What It Is, Types, and How to Use It
Translucent Powder: What It Is, Purpose, and How to Use It
Learn how translucent powder sets makeup, controls shine, and blurs imperfections without altering your foundation shade.
Eyeliner: What It Is, Types, and How to Use It
Eyelash curler: what it is, types, and how to use it
What is a lip plumper: types and instructions for use
Shimmer: What It Is in Clothing and Fashion | Glossary
Glitter in fashion: what it is, its types, and what to wear it with
Swatch: What is it in fashion and design | Glossary
Strobing in clothing: what is this stylistic technique?
Makeup Pigment: What It Is and How to Use It
What is a refill: the meaning of the term and types of replaceable blocks
What is a Kabuki Brush: Types and Applications
What is baking in makeup: technique and features
Duofiber brush: what it is and how to use it correctly
What is a luminizer: types and rules of use
What Is Cut Crease Makeup: Types, Techniques, and Tips
A complete guide to the cut crease makeup technique, exploring its variations, application methods, and benefits for different eye shapes.
What is draping in clothing: a dictionary of fashion terms
What is concealer: types, differences, and application methods
What is a face primer: types and application rules
Highlighter: What it is, types and application rules
What is facial contouring: types and techniques
BB cream: what it is, properties, and application rules
What is CC cream: properties, differences, and application rules
Smokey eyes: what it is, types of makeup, and combination rules
Frequently Asked Questions
What is your color type?
Find out your seasonal color type and choose clothes that highlight your natural beauty.
About the author
Unlock MioLook
for €0.99
Start creating perfect outfits with artificial intelligence
Get access — €0.99 onceRelated Articles
The perfect basic makeup bag for everyday use
We're putting together the perfect morning beauty capsule in 15 minutes. Only th...
Cosmetics for Beginners: What to Buy First
Forget about dozens of jars and complicated techniques. We'll show you how to pu...
A Basic Cosmetic Bag for a 40-Year-Old Woman: Makeup Secrets
About 80% of anti-aging products are pure marketing. Learn how to put together a...
Everyday Makeup: Step-by-Step Tutorials and Ideas
Forget heavy contouring and heavy colors. Learn the key rules of modern everyday...