Why bother: How photo quality affects a virtual stylist's work
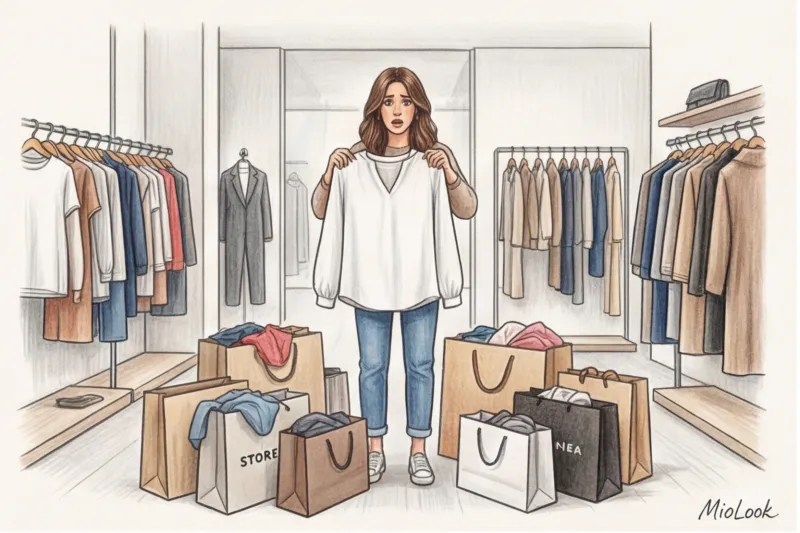
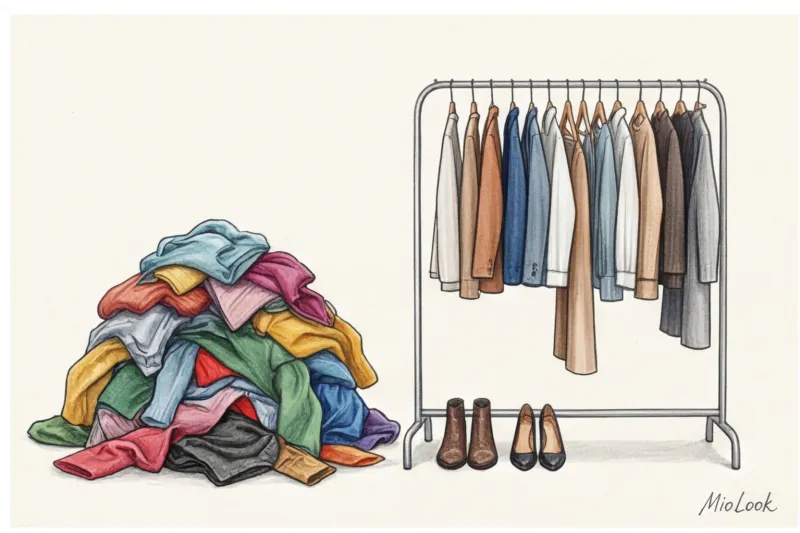
Do you know what phrase I most often hear when auditing new clients' digital closets? "Katarzyna, this app is suggesting completely ridiculous and boring looks!" But when we open the profile, the reason becomes obvious: dresses are photographed under the yellow light of a hallway bulb, and trousers are casually thrown on a rumpled bed. Before blaming artificial intelligence, it's important to understand a basic rule: How to photograph clothes for a virtual wardrobe , directly determines how stylish and wearable your future looks will be.
Let's look at the technical side of things. When you upload a photo to MioLook , the neural network doesn't see "your favorite silk blouse." It uses computer vision algorithms to analyze pixels. The program reads RGB codes to determine the exact shade, looks for contrasting edges to recognize the silhouette (whether it's oversized or fitted), and analyzes the shadow map to understand the fabric's texture. If the item is photographed in dim light or wrinkled, the algorithm receives distorted data. We wrote more about the mechanics in the guide. clothing image generator and AI work.
A digital wardrobe operates according to a strict IT rule: "Garbage in, garbage out." A neural network lacks the imagination to accurately predict the real appearance of an item if it appears as a shapeless blob in a photo.
In my practice, the most common problem is a simple color distortion due to lighting. Let's take a classic example from my recent analysis: a gorgeous navy merino wool sweater from COS, priced at around €115. A client photographed it in the evening under artificial room light. As a result, the smartphone's sensor turned the deep blue into a dull black. What does the smart algorithm do? It honestly selects complementary colors for the "black" sweater according to the rules of coloristics. So, in the morning, you put on the suggested outfit, look in the mirror, and realize that the colors clash drastically. The AI wasn't wrong—it was working with the input you provided.
The third important aspect is the psychological illusion of "good enough." Many women think, "The important thing is that the item is added to the database, and how it looks on the icon is of secondary importance." This is a fatal mistake for your personal style. If a basic white shirt is photographed crumpled against a colorful carpet, it will look sloppy in the finished capsule collection on the screen. In 12 years of working as a stylist, I've clearly learned: we don't wear things that don't evoke visual inspiration.
During one of our consultations, we uploaded a cashmere cardigan, shot in a hurry. The app persistently suggested baggy joggers to pair it with, as the abundance of folds in the photo made it look like a casual sweatshirt. Once we reshot it correctly—laying it out evenly in daylight—the algorithm instantly recognized the refined texture and suggested elegant pairings with a silk midi skirt. Invest a little time in high-quality source material, and the virtual stylist will make every minute count.
Stylist's rule: don't take pictures of everything
According to statistics from the research organization WRAP, the average European woman regularly wears only 20-30% of her closet contents. The rest hangs there as dead weight. It's logical to assume that when installing a fashion app, the first thought is to photograph every single shirt. This is the main mistake I see newbies make.
Many clients ask me how to photograph clothes for their virtual wardrobe so that the algorithm can create aesthetically pleasing looks. My first piece of advice always sounds counterintuitive: don't photograph everything. Digitization is the perfect, completely painless moment for decluttering. You're not just creating a catalog; you're curating a personal boutique. Mindlessly transferring physical chaos to digital will only lead to your smart feed suggesting hundreds of irrelevant combinations.
Immediately put aside three categories of things that absolutely have no place in your profile:
- Clothes for the dacha and walking the dog in the mud. Stretched sweatshirts and faded T-shirts are not part of any style formula. The algorithm shouldn't waste computing power suggesting a combination of tailored trousers and a hoodie with a permanent stain.
- Things from the "when I lose weight" category. If designer jeans have been waiting in the wings for three years, their appearance on your smartphone screen will cause daily guilt and visual stress. Keep only those items that fit perfectly in your active wear list. right now.
- Worn knitwear. Even an expensive €150 cashmere jumper, covered in pilling or out of shape, will ruin any virtual outfit. If a lint-cutting machine (which costs €15 at most) doesn't help, it's time to recycle the item.
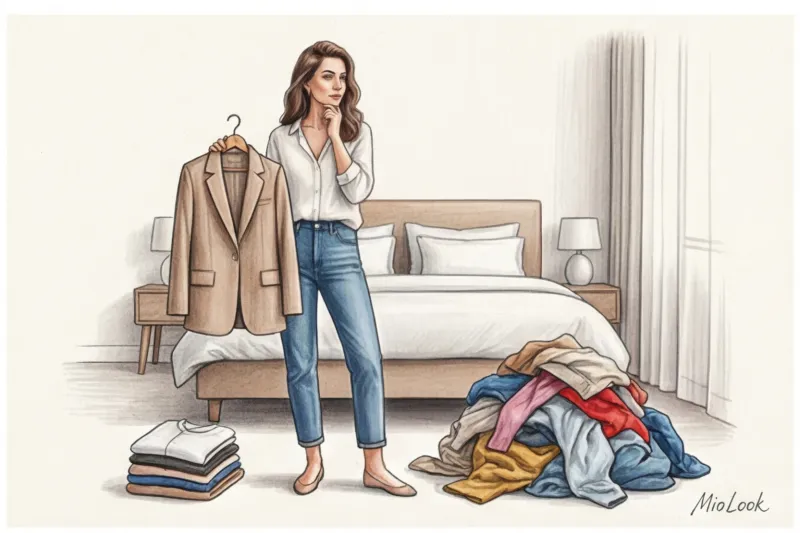
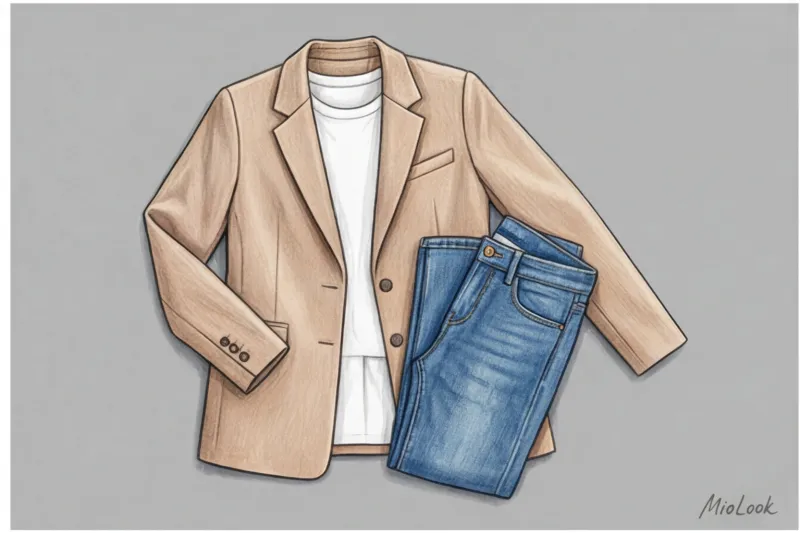
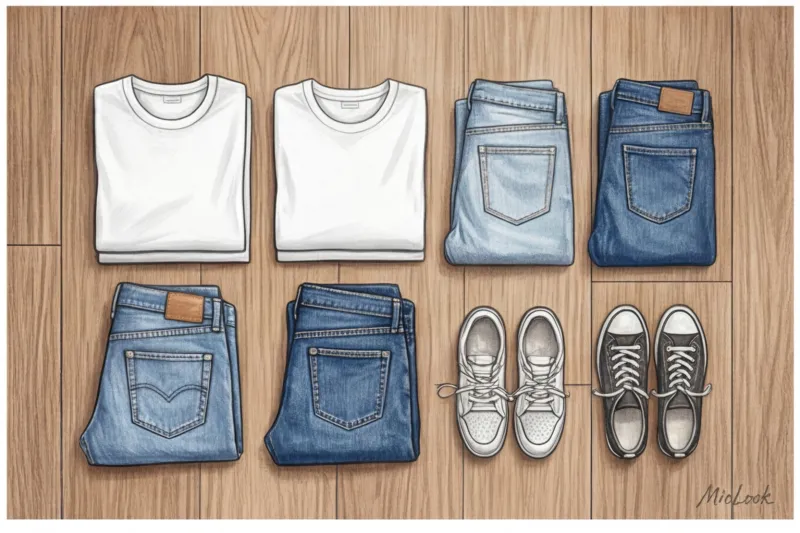
Instead of a multi-hour inventory, focus on the core. Start with your basic capsule—those tried-and-true pieces that make up 80% of your everyday outfits. These include your perfectly fitting wide-leg trousers (like those from Massimo Dutti or COS), your favorite well-cut white shirt, a pair of quality merino wool sweaters, basic jeans, and a structured jacket.
"The secret to a successful digital wardrobe isn't the number of items you've loaded, but their highly combinable nature. Ten well-designed, on-trend pieces will give you more wearable looks than fifty random sale buys you've added just to have."
Try MioLook for free
A smart AI stylist will select the perfect look from your best items.
Start for freeA micro-step for today: select no more than 25-30 items for your first photo shoot. This amount will be more than enough for the neural network to start generating dozens of fresh, stylish combinations, and you won't burn out during the photo shoot.
Organizing a Home Studio in 5 Minutes: What You'll Need
A common excuse I hear during consultations is, "I can't digitalize my closet beautifully; I don't have proper lighting or a suitable background." Many women sincerely believe that to get a high-quality image in an app, you need a softbox or at least a trendy selfie ring light. In reality, the perfect workspace can be assembled in your living room in exactly five minutes, and it rarely costs more than a cup of coffee.
If you're looking for the best way to photograph clothes for a virtual wardrobe on the first try and without color distortion, start by finding the right light. The best source is a simple window. But there's a key caveat: we need only diffused daylight , without direct sunlight. Bright midday sun will create harsh, graphic shadows and simply "burn" the colors in the photo—your favorite emerald cardigan will appear faded green with whitish spots. The ideal time to shoot is first half of the day, when the sun is shining through the window opposite, or on slightly cloudy days, which act as a giant natural filter.
Let's agree right away: we categorically refuse to use built-in flash or the ever-popular ring lights. I often receive catalogs shot under such lighting, and it's disastrous for the texture of the fabric. Artificial direct light creates harsh, pinpoint highlights. A silk slip dress from Massimo Dutti will turn into a chaotically shiny blob, and the smooth leather of an expensive bag will look like cheap plastic due to the aggressively reflected light.
Now let's talk about the background. The main enemy of any background removal algorithm is a regular bed. Photographing items on a wrinkled sheet or a bulky blanket is absolutely forbidden. The neural networks in these apps are designed to detect contrast differences. They perceive the numerous folds in the sheet fabric as a structural extension of your item. This creates false shadows that the algorithm can't distinguish from the sleeve or hem. The end result is a crookedly cropped image with jagged edges, which will visually cheapen any image collage.
My personal styling lifehack, which saves hundreds of clients the hassle before sorting through their wardrobes: go to your nearest stationery store. Forget about buying special vinyl photo backdrops. The cheapest and absolutely perfect solution is two sheets of thick, matte A1 paper.
You'll need one pure white sheet and one light gray sheet (the gray one will save you when photographing white shirts, preventing them from blending in with the background). This set will cost you literally €3-5, but the results will be indistinguishable from studio product photography.

Why matte poster board? Its surface absorbs rather than reflects light. You simply place the board on the floor as close to the window as possible, carefully spread the item out, and take the photo. No creases, no unwanted shadows from the texture of the floor or carpet.
A small technical detail from my experience: when laying out the drawing paper on the floor, be mindful of your position. A common mistake is standing with your back to the window, blocking the light source and casting a shadow directly onto the pants you're photographing. Stand to the side of the composition. The smartphone lens should be parallel to the floor, and the diffused light should softly illuminate the garment from one side. This simple setup, using two pieces of paper and the right shooting angle, saves hours of manually editing backgrounds in an app.
Step-by-step instructions: how to photograph clothes for a virtual wardrobe
One of my clients in Berlin spent an entire weekend digitizing her closet, but the app's built-in algorithm persistently suggested completely incongruous combinations. When we opened the original photos, the problem became obvious: classic straight-leg jeans had become tapered "carrot-leg" jeans, and oversized jackets looked like shapeless squares. The cause was a simple geometric distortion in the frame.
If you're looking for a working algorithm for photographing clothes for a virtual wardrobe the first time and without alterations, start with two strict rules of composition. First, the item should take up exactly 80% of the frame Too much empty background forces the algorithms to compress the image, which results in a loss of fabric texture. Too close-up, and the neural network will "cut off" the sleeve edges.
As noted by specialists at the Fashion Institute of Technology (FIT, 2023), computer vision neural networks calculate clothing proportions mathematically. A perspective distortion of just 10 degrees dramatically alters the algorithmic perception of the cut.
Secondly, your camera lens should be positioned strictly parallel to the plane , on which the item is placed. Avoid shooting at an angle or from your height if the item is on a bed. Turn on the "Grid" feature in your smartphone's camera settings. If you're shooting on the floor, stand directly above the item. If you feel the phone tilting toward you, use a small stepladder or stool. Only parallel shooting guarantees the correct proportions.
Flatlay vs. Hanger
The most common question I get during my consultations is: is it necessary to lay everything out on the floor or can I just hang it on the closet door? My answer is always clear, and it depends on the item's category.
Any knitwear—chunky knit sweaters, thin cashmere cardigans, basic T-shirts—should be removed. only in the layout (flatlay) A heavy sweater instantly stretches under its own weight on a hanger. This not only ruins the garment itself, distorting the shoulder line, but also gives the AI an incorrect, elongated silhouette. The same goes for knit dresses: on a hanger, they look like sad sacks, but on a flat surface, you can shape them into the perfect shape.
Jackets, heavy shirts, structured dresses, and coats, however, require a different approach. These garments have their own structure: shoulder pads, darts, and a stiff collar. The "invisible hanger" method works perfectly here, or using thin hangers that match the color of your background (for example, white hangers on white poster board). The hanger supports the shoulder girdle, making the garment look as if it's already worn.
The most important detail when shaping a silhouette is working with the sleeves. The most common mistake beginners make is pressing the sleeves tightly against the body of the garment. Never do this! Be sure to leave some air between the sleeve and the side seam. The neural network should clearly see the armhole line. Slightly pull the sleeves out to the sides and bend them at the elbows, creating a natural, relaxed pose. This will ensure the garment's cut is read as accurately as possible.
Try MioLook for free
Start creating perfect images with the help of artificial intelligence
Start for freeHow to show the length and fit of bottoms (trousers, skirts)
Shooting bottoms requires special care, as neural networks make the most mistakes with pants. Take, for example, the incredibly popular wide-leg jeans or palazzo pants. If you simply place them against a background with the legs together, they will merge into a single rectangular blob. The algorithm will recognize them as a maxi skirt with a 90% probability. To avoid this, slightly spread the legs apart. There should be a gap of 10-15 centimeters between them at the bottom so that the background forms a clear inverted triangle. This way, the AI will recognize the pants as the real thing.
The second critical rule: impeccable display of belt and fittings Don't cut off the waist in an attempt to fit long trousers into the frame! The waistband dictates the fit. The fly, buttons, belt loops, and pleats are all style markers. Even basic €40 jeans from the mass market will look like premium denim in virtual capsule collections if you highlight their high waist and cut details correctly.
When it comes to skirts, we work like sculptors. Maintaining an A-line silhouette requires carefully fanning the hem out on a flat surface—smoothing the fabric with your hands from the center outward. A pencil skirt, on the other hand, should lie flat, clearly demonstrating its tapering at the bottom.
To be fair, I'll admit: this rule doesn't always work. If you have a thin silk skirt cut on the bias, laying it out beautifully on a rigid surface is a near-impossible task. In these rare cases, I allow clients to bend the rules and use a hanger with soft clips to capture the natural flow and drape of the complex fabric.
Stylist Secrets: Capturing Complex Textures and Colors
Modern smartphone cameras handle landscapes beautifully, but often struggle with fabric textures. The optical sensor tries to average out the exposure, resulting in matte materials blending into the background, and glossy materials being covered in cheap, white highlights. When browsing brand catalogs, I always pay attention to lighting. A luxurious €120 blouse made of heavy, natural silk from &OtherStories risks turning into a flat piece of polyester in a poorly taken home photo.
When new clients ask me, How to photograph clothes for a virtual wardrobe To avoid such visual distortions, I start with the physics of light. A lens can't understand volume without the play of light and shadow. As a result, a smart algorithm receives distorted data about the material and suggests you combine a formal, shiny satin with casual joggers, thinking it's ordinary cotton. MioLook or another digital assistant correctly reads the density and purpose of the item, we need to “explain” the texture to the camera.
White on white and black on black
The most challenging task in digital imaging is capturing monochrome objects so that the neural network doesn't cut off the collar or sleeves when removing the background. A study of image segmentation algorithms conducted by Adobe engineers (2022) clearly demonstrates that the program detects the boundary of an object solely by the difference in contrasting pixels. If you place a crisp white COS shirt on a white sheet or white poster board, the edges will optically disappear.
This is where the rule of contrast comes into play. For light-colored clothing (white, cream, light yellow), I always use thick, light-gray drawing paper. This shade is neutral enough not to distort the phone's automatic white balance, but it provides a clear, dark outline for accurate silhouette clipping.
With black, the problem is exactly the opposite—the garment turns into a flat "black hole" without darts, buttons, or lapels. To bring out the details in a jet-black blazer or a textured wool turtleneck by Massimo Dutti, we need hard, sidelight. Position the light source (or window) directly to the side so the rays glide across the surface of the fabric, revealing every micro-shadow in the folds. Additionally, while shooting, tap the darkest part of the garment on the smartphone screen and slightly raise the exposure slider. The fabric on the screen will lighten to a dark gray, but the AI will recognize the complex cut. After removing the background in the app, the visual balance will be restored.
Prints, sequins and silk
Glossy surfaces are the main enemies of telephone automation. Sequins, satin, and viscose with a satin weave reflect light unevenly, creating harsh highlights in the lens.

To avoid burnt white spots on glossy fabrics, it's essential to diffuse the light as much as possible. If you're shooting by a window on a sunny day, be sure to draw a translucent curtain or even glue some baking paper to the glass. This will create the effect of a professional softbox. Silk, for example, requires soft, enveloping lighting—only in these conditions will the rich, elegant shimmer be visible in the photo.
Small prints (houndstooth, pied-de-poule, small polka dots, or pinstripes) pose another technical challenge: the moiré effect. When digitally compressing a photo, the algorithm often interprets such patterns as visual noise or ripples. To avoid this, hold the camera absolutely still and lock the focus manually. Long-press the smartphone screen on the patterned area until the "AE/AF Lock" message appears. If the print still blurs, move the phone a few centimeters closer, sacrificing the edges of the garment: it's crucial for the neural network to understand the fabric pattern itself rather than see the surrounding blank background.
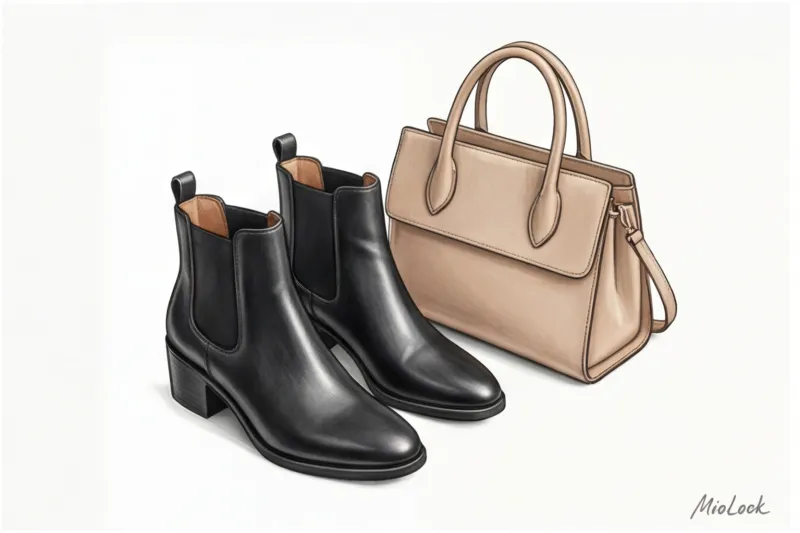
Shoes, bags and accessories
Digitalization doesn't stop with basic clothing. Accessories are the glue that holds any look together, but translating them into an app requires entirely different rules. The architecture of a shoe last or the shape of a bag simply isn't legible when viewed strictly from above.
Shoes are never photographed from a flat-foot angle (viewed from above). Remember how distorted your own feet look when you look at them standing up? The correct angle for shoes is strictly in profile, so the shape of the toe, height, and curve of the heel are clearly visible. Alternatively, shooting at a 45-degree angle (three-quarter angle), slightly turning the pair toward the camera, works great. From this angle, Zara ankle boots or loafers with chunky soles immediately acquire realistic volume and the correct proportions, which helps when creating outfits.
When working with bags, I apply the golden rule of visual merchandising: the item should look as it would in real life. Framed items (totes, briefcases, and crossbody bags made of stiff leather) are photographed as is. However, soft bags—for example, popular hobo bags or totes—must be filled before shooting. If you place an empty soft bag on a background, it will collapse into a shapeless mass. Stuff it with craft paper, rolled scarves, or bubble wrap to simulate natural volume.
Long accessories like belts, ties, and scarves create visual chaos if you try to fit them into the frame in a single line. A leather belt should be twisted into a neat, but not tight, loop, tucking the end inside and leaving the beautiful buckle visible. Bulky winter scarves or thin cashmere stoles are best tied in an aesthetically pleasing, slightly loose knot. This not only saves space in the frame but also showcases the fabric's flexibility—a smart algorithm will immediately recognize a soft, draping accessory.
AI Optimization: How to Help a Neural Network Remove Background
I recently analyzed a confidential 2023 report from developers of machine learning systems for the fashion sector, and their internal data is telling: over 68% of errors in automatic background extraction are not due to weaknesses in the algorithms, but to improperly prepared source frames. The human eye instantly distinguishes the edge of a beige trench coat from the light laminate flooring, but to software code, these are merely arrays of pixels with virtually identical brightness values.
That's why Contrast is the best friend of Computer Vision algorithms. Machine vision is tuned to detect sharp changes in color and light to determine the boundaries of an object (called edge pixels). When people ask me how to photograph clothes for a virtual wardrobe without having to manually erase the excess background on the screen, I advise thinking of the process as if creating a stencil. If you place a dark blue sweater on a black carpet, the physical boundary will disappear. The neural network will have to guess the contour, and it will inevitably cut off half the sleeve or distort the shoulder line. Your goal is to ensure maximum optical contrast between the fabric and the surface.

The second, no less insidious problem with digitalization is working with shadows. Pay close attention to how the light falls. If you use a hard, directional light source (for example, by moving a desk lamp close), the dense fabric will cast a deep, graphic shadow onto the background. The neural network, scanning the contours, often perceives this contrasting dark depression as part of the garment itself. As a result, your favorite tailored jacket from Massimo Dutti will end up with a shapeless dark "wing" on one side after processing. There's only one solution: shoot only in diffused light, which produces a soft, transparent penumbra—it won't confuse the optical sensors.
The third crucial aspect, which almost all beginners forget, is correctly shaping the silhouette of the garment before clicking the shutter. In digital apps, garments are layered in files with transparent backgrounds. If you photograph a carelessly tossed, unbuttoned cardigan from &Other Stories, with the edges chaotically curled inward, the algorithm will faithfully and accurately cut out this crooked, jagged shape.
Why are unbuttoned buttons and zippers so critical? Because a carelessly opened garment is cut asymmetrically and ruins the entire look in the image creator. When you try to visually "wear" such a cardigan over a basic T-shirt, the layers simply won't match. Virtual holes will appear in the silhouette, the collar will slip, and the final collage will look extremely untidy. To ensure the AI produces perfect patterns, always apply the rule of strict geometry:
- Button all buttons completely. on shirts, jackets and coats.
- Lightning On jackets, hoodies and tracksuit tops, cover at least three-quarters of the length.
- Straighten the sides products so that they lie parallel to each other and form a clear rectangular or A-line silhouette.
Spending an extra 15 seconds fastening the hardware before shooting will save you hours of trying to put together an aesthetically pleasing everyday look from shapeless scraps of fabric in an app.
Your ideal image
it begins Here
Join thousands of users who look flawless every day with MioLook.
Start for freeAction Plan: How to Photograph Your Entire Wardrobe in a Weekend
Last month, I digitized a closet for a top manager at a Swiss bank. We had exactly three hours to photograph 140 items of clothing, shoes, and bags. How did we do it? We applied a wardrobe architect's approach: strict production logistics instead of creative chaos. If you think transferring items to a smartphone will take weeks, you're wrong. The main secret to speed lies in the correct sequence of actions.
The first step in any professional photoshoot is preparing the texture. Never shoot wrinkled items you've just pulled from the back shelf. Wrinkled clothes look downright cheap on the screen, and no smart algorithms can fix that. Spend 40 minutes steaming with a good steamer before starting the process. Smooth fabric not only looks aesthetically pleasing in the finished virtual capsules, but also eliminates the false shadows created by deep creases in the light. Imagine how ridiculous a luxurious silk Massimo Dutti top would look if it appeared overdried and wrinkled in the look editor.
The second, most destructive mistake that eats up hours of your time is trying to shoot things with ready-made looks. "Okay, I'll take a picture of a white shirt now, then blue jeans to go with it, and loafers at the same time." No, and again no! If you want to understand how to photograph clothes for a virtual wardrobe with maximum efficiency, use the strict conveyor method.
Why is a conveyor belt so important? Each category of items requires its own micro-adjustment of the space: for pants, you need to stand back a little further to capture the entire length of the legs; for bags and shoes, you need to tilt the camera 45 degrees. If you constantly change these settings for a single shot, you hopelessly lose your rhythm. Group items strictly by type. First, shoot all the tops, sweatshirts, and t-shirts, because they require an absolutely identical layout. Then move on to pants and jeans. Finish with a block of shoes and accessories. With this approach, capturing each item takes about 40-50 seconds.
Let's distill this process into a clear, step-by-step checklist. Here's an algorithm that allows my clients to save up to €150 (the average cost of a basic hourly assistant/organizer) and do everything themselves, without stretching the process out over a month:
- Step 1: Sorting and preparation. Divide your wardrobe into neat piles: "shoulder pieces," "belt pieces," "shoes," and "bags." Turn on the steamer and iron everything that needs ironing.
- Step 2: Fixing the background. Lay your drawing paper out on the floor near a window during the best hours of daylight. Be sure to secure the edges with masking tape to prevent the background from slipping. Wipe your smartphone camera lens with a microfiber cloth—it's a simple step, but it improves the sharpness of details by a third.
- Step 3: Shooting in blocks. Turn on your favorite podcast and get going. Lay down the garment, straighten the sleeves, take a photo, and put it away. Don't waste time examining and zooming in on each photo; just make sure the lens is focused on the fabric.
- Step 4: Batch upload. When your phone gallery is filled with perfect sources, sit down on the couch with a cup of coffee and open MioLook The app lets you upload photos in batches: simply select the entire block of photos you've taken, and the built-in AI automatically removes the background from dozens of photos at once.
Digitization doesn't have to be a painful chore. Treat this weekend like a general inventory of your assets—you'll finally see the true scale of your wardrobe and create the perfect foundation for further style development.
Things in the app: what to do next?
The camera marathon is over, and the last batch of photos has been sent for processing. My regular clients say this is when a slight euphoria of accomplishment sets in, and it's tempting to simply close the app with a sense of accomplishment. But the system isn't yet ready to work 100% for you. For the smart algorithm to fully transform into your pocket personal stylist, three final steps are necessary.
Step one: check the results and adjust the background. Computer vision systems are phenomenally accurate today, but the physics of complex textures still apply. Be sure to browse the newly uploaded catalog. If the neural network has cut the edges of your favorite fluffy alpaca cardigan from &Other Stories too aggressively, mistaking the fur for visual noise, use the manual editing tool. A few swipes with the virtual eraser will restore the garment's correct silhouette. This is critical: when you start assembling multi-layered outfits, carelessly cut edges will disrupt the proportions of the collage, detracting from the aesthetics of the image.
Step two: filling in the metadata. This is the most routine, yet absolutely necessary, part of the process. A digital cabinet without tags is just film, not a functional tool.
"Specifying the characteristics of an item turns an image into a clear data point. A neural network can't touch your sweater to figure out how warm it is. You have to tell it."
Spend another 15-20 minutes adding key parameters to each position:
- Brand and price: It helps you track the true cost of your wardrobe and calculate your Cost Per Wear. When you clearly see that you've worn a basic €180 Massimo Dutti jacket 40 times, but not a single time on an impulse purchase of a €50 sequin dress, your future shopping habits change forever.
- Seasonality: The markings "winter", "summer" or "demi-season" exclude absurd recommendations from AI.
- Fabric composition: According to a McKinsey analytical report (2024), fashion app algorithms are 40% more accurate when they take into account the physical properties of materials. By specifying "100% linen," "silk," or "heavy denim," you can help the AI assistant select items based on temperature and texture contrast.
Step three – assembling the first capsule. Once the database is fully structured, the pure creative phase begins. I strongly recommend against trying to combine all 80 or 100 shots at once. Start small: identify a core of 10-12 items (for example, 3 bottoms, 5 tops, 1 jacket, and 2 pairs of shoes) for the upcoming work week.
Launch the AI assistant and let it suggest basic looks from this mini-capsule. It's often AI, stripped of our usual stylistic patterns, that notices subtle connections. One of my clients was genuinely amazed when the algorithm suggested she pair a tailored suit skirt not with her usual basic shirt, but with a chunky, chunky knit sweater from COS, creating the perfect relaxed silhouette that she hadn't even considered.
It's moments like these that make the effort to digitize your wardrobe truly pay off. Now you know exactly how to photograph clothes for your virtual wardrobe to avoid technical errors and get the most out of smart algorithms. Your digital closet is ready. No more mornings spent stumbling in front of open doors—it's time to start creating the art of everyday style in the app. MioLook.
Guide Chapters
How to Prepare Clothes for Product Photography: Tips
Virtual wardrobe algorithms often fail to recognize wrinkled items. We explain why proper ironing is the key to perfect digitization.
Phone camera settings for photographing clothes without distortion
Why do clothes look fat in photos and distort proportions? Learn how to properly set your smartphone camera to perfectly capture your wardrobe.
How to photograph black clothing so that the texture is visible?
A stylist's secrets for photographing complex fabrics. Learn to convey the depth of black, the sheen of silk, and the whiteness of shirts for your digital wardrobe.
How to Photograph Shoes for an App: A Guide
Photographing accessories is fundamentally different from photographing clothing. We'll explain how to properly digitize shoes and bags for a virtual fitting room.
TOP: Mistakes When Photographing Clothes for Apps
Artificial intelligence can't read minds; it reads pixels. We'll explore five common mistakes when photographing things that can cause apps to misunderstand you.
How to Quickly Digitize Your Wardrobe: A Weekend Plan
A stylist's step-by-step guide to creating a virtual closet in just one weekend. Eliminate clutter and create the perfect digital wardrobe.
How to Lay Out Clothes for Photos: Tips
Want to digitize your wardrobe, but your clothes look shapeless in photos? Learn professional stylist secrets for preparing clothes for photo shoots.
What's the best background for photographing clothes for neural networks?
Why does AI often cut off sleeves when digitizing a wardrobe? Learn the key secrets to choosing the perfect background for photographing clothes at home.
Light: How to Photograph Clothes Without Color Distortion
Is artificial intelligence confusing colors? We'll explain how to properly light and photograph a wardrobe to convey the complex shades of fabrics.