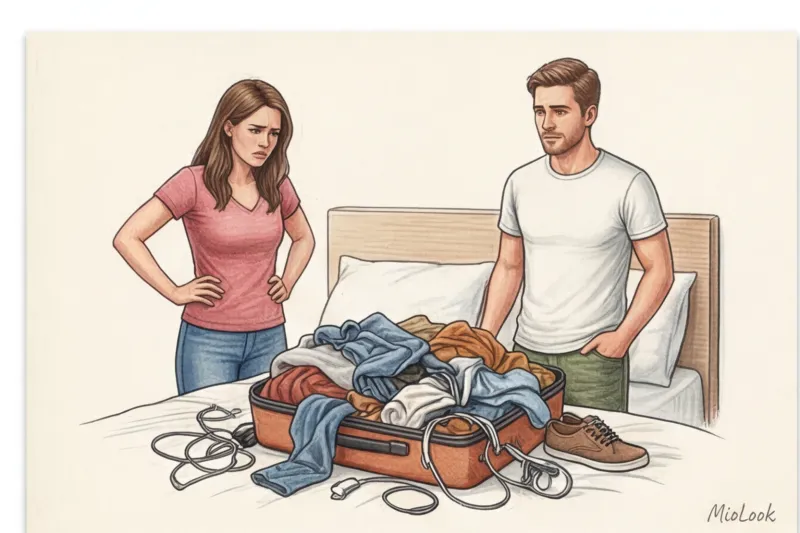
It was exactly 15 minutes before my client was scheduled to go on stage at a major business conference. Her look was impeccable—a minimalist, loose-fitting suit from The Row, her hair perfectly coiffed. But then my gaze fell: on the toe of her black Prada pumps was a deep, ugly white scratch from an escalator step five minutes earlier. Panic? Not at all. I simply pulled a tiny tube out of my work case. It's in moments like these that knowing... How to use liquid leather , turns from a banal everyday skill into a real superpower.
I wrote in more detail about the basics of working with capricious materials and basic damage prevention in our a complete guide to caring for leather items But today we're talking heavy artillery. In 12 years of working as a stylist at Paris and Milan Fashion Weeks, I've learned one rule: a worn bag or a worn heel ruins the impression of an expensive look faster than cheap fabric.
According to a 2024 report by the analytical agency WGSN, repair culture has finally replaced the fast-fashion habit of throwing away items at the first scratch. But this article isn't just a car seat repair manual, as the internet is littered with. It's a professional guide for connoisseurs of "quiet luxury" on discreetly restoring a prestigious wardrobe using color-matching techniques.
What is liquid leather and why is it essential in a prestigious wardrobe?
Let's dispel the main marketing myth right away. Liquid leather is not a miracle glue, paint, or a liquid piece of animal hide. From a polymer chemistry perspective, it's a high-tech filler (putty) based on water, alcohol, or polyurethane.
How does this material work? When applied, the polyurethane base penetrates the porous structure of natural leather. As the alcohol and water evaporate, they leave behind a flexible polymer layer that firmly adheres to the edges of the scratch.
"In restoration workshops like Hermès or Chanel, they never use aggressive adhesives to conceal scratches. They use only flexible polyurethane compounds that can move with the piece," explain technicians at leading European ateliers.
The math behind a conscious wardrobe is incredibly simple. Professional corner restoration on a designer bag at a studio will cost you $150–$300, depending on the complexity of the pigment. A tube of high-quality liquid leather costs around $15–$20. With the right approach, no one but you will notice the difference.
What materials will this work for and what won't it work for?
This tool requires an understanding of textures. Ideal compatibility is guaranteed with smooth natural leather (sheepskin, calfskin nappa) and high-quality, dense polyurethane-based eco-leather.
I say a categorical "no" to any napped materials: suede, nubuck, and velour will be hopelessly ruined (the polymer will simply glue the nap together into a dirty, plasticky lump). Also, forget about repairing patent leather—on a mirrored surface, the filler will leave a dull, matte stain that requires a completely different chemical treatment.
Organize your closet like a pro
Upload photos of your items to MioLook, and the smart algorithm will help you create dozens of new looks using what you already own.
Start for freeHow to Use Liquid Leather: A Professional Step-by-Step Guide
The main secret to successful restoration, taught in leatherworking courses, sounds paradoxical: 80% of success comes not from the application of the resin, but from the surface preparation. If you simply smear a polymer over a scratch, it will fall off within a week.
The golden rule of working with liquid leather is to apply ultra-thin layers. Never try to fill a deep scratch with one thick layer. The polymer dries from the outside in. If the layer is too thick, it will remain liquid on the inside and form a film on the outside. As a result, the patch will collapse or bubble.
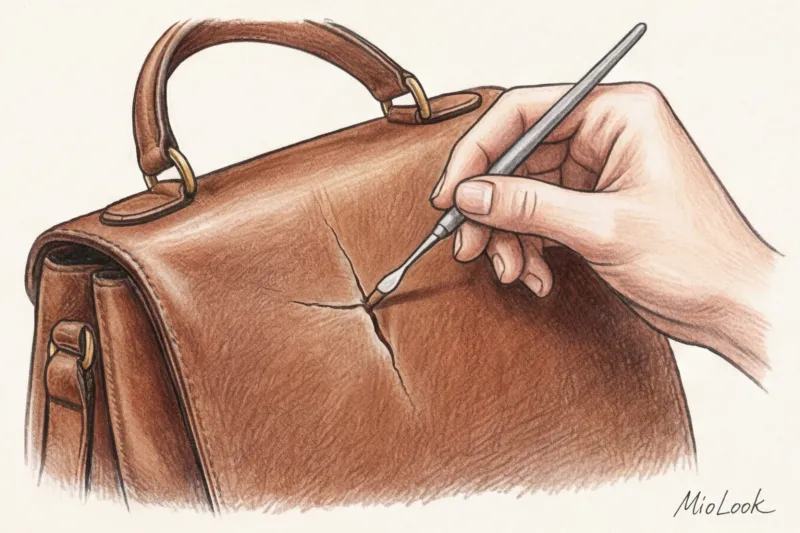
Step 1: Degreasing and sanding
First, remove the old protective layer (aperture), factory wax, and dirt. Use sharp nail scissors or tweezers to carefully trim away any loose skin along the edges of the tear. The edges should be perfectly smooth.
Next, treat the area with an alcohol wipe or a special cleaner. Never use pure acetone on shoes or bags—it will instantly burn off the factory paint around the scratch, and instead of a tiny scratch, you'll end up with a huge, whitish stain.
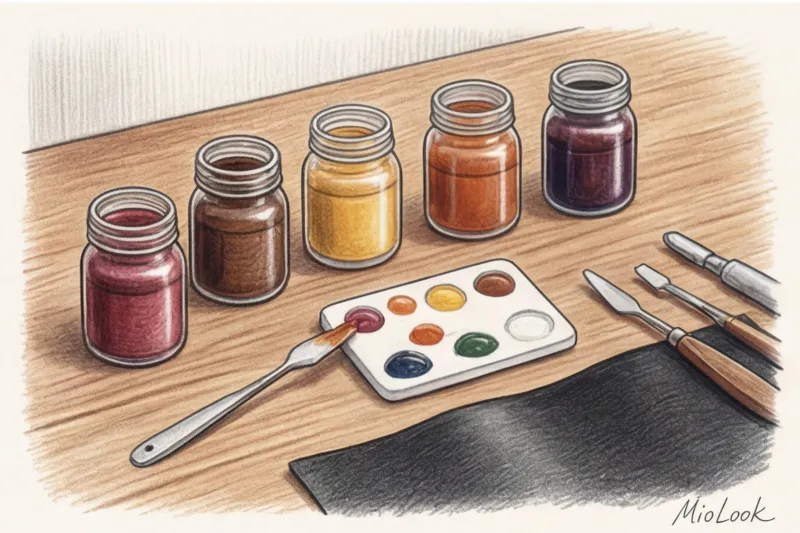
Step 2: The Art of Color Matching
Applying color directly from the tube is a classic rookie mistake. Even if the tube says "black" and your shoes are also black, the shades won't match. Leather fades, oxidizes, and changes its undertone with wear.
Use the basic principles of the color wheel. Is your brown too cool and gray? Add a tiny drop of red. Is your black looking blue? A tiny touch of yellow or brown will do the trick. Be sure to test the resulting mixture on a hidden area of the garment (for example, on the inside of a bag strap). Keep in mind: wet liquid leather is always 1-2 shades lighter than completely dry leather. Wait for the test patch to cure.
A life hack from my practice: To prevent the repaired area from looking like a glossy plastic patch on matte leather, I never smooth the final layer with a spatula. I use a regular porous cosmetic sponge (a beauty blender). By lightly tapping the sponge onto the semi-damp polymer, I can perfectly recreate the texture (microrelief) of the leather.
Not sure what to wear with your restored item?
MioLook's artificial intelligence will analyze your style and suggest the best combinations for your favorite bag or shoes.
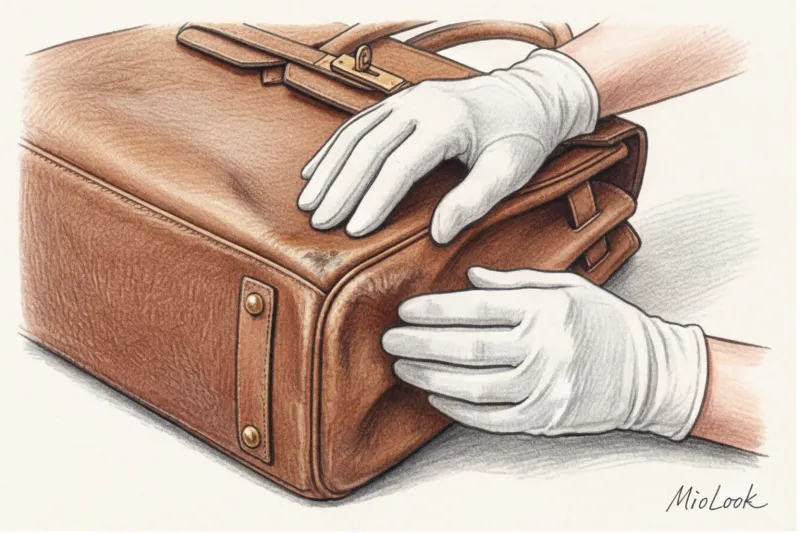
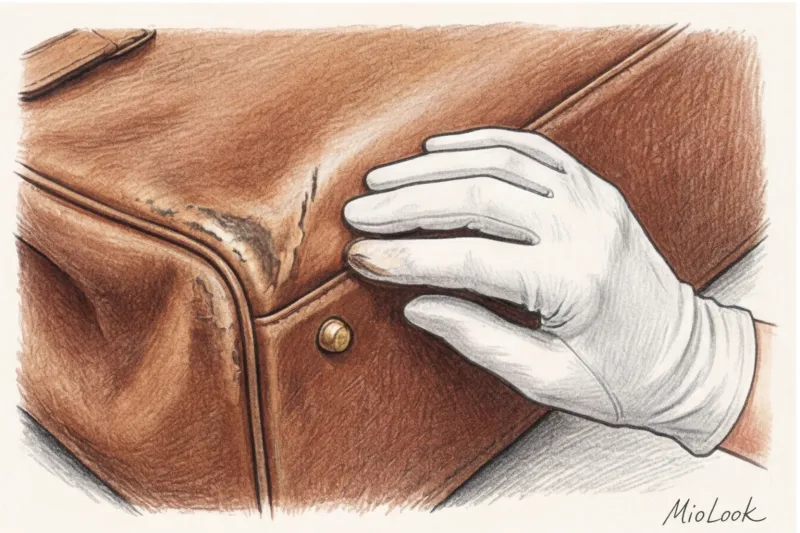
Choose an imageRescue scenarios: from chipped shoe toes to the corners of your favorite bag
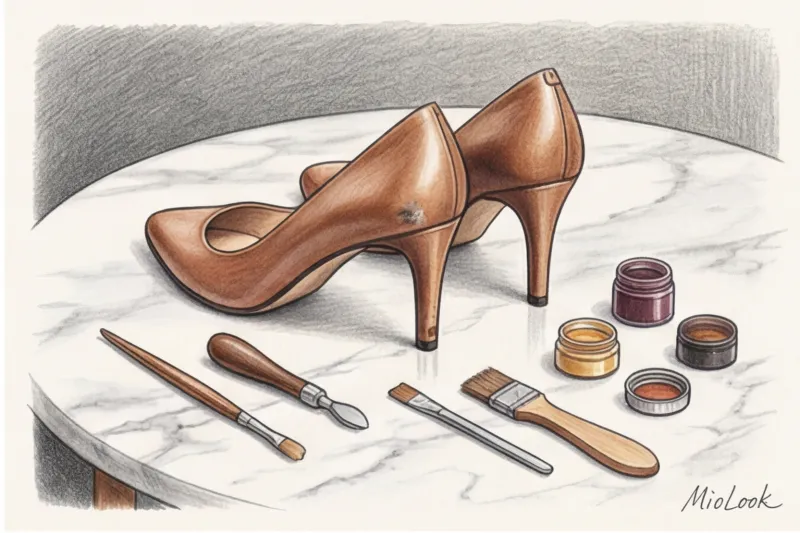
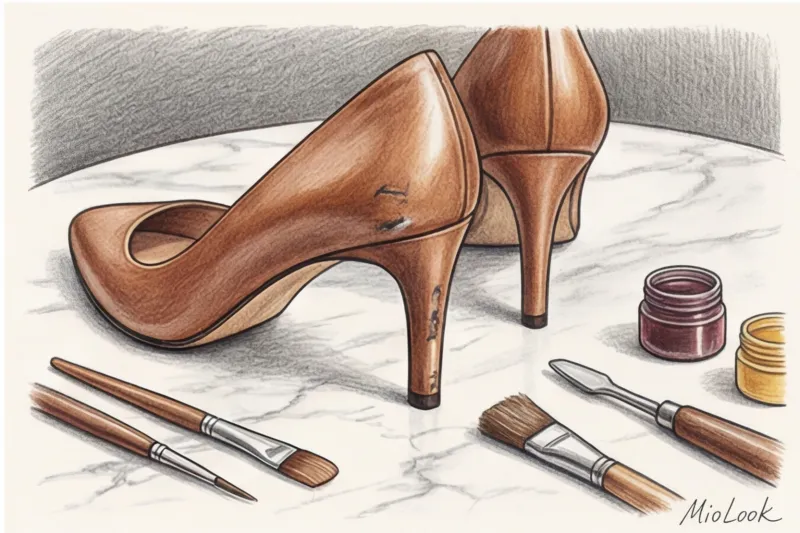
Polymer fillers can work wonders when applied in the right places. The most common item to suffer in my suitcase on shoots is shoes. A stiletto heel covered in the finest kid leather, stuck in a storm drain grate, is a classic example. In this case, I carefully glue the torn flap of leather with a toothpick (glue is what's needed here), and then fill the joints and microcracks with liquid leather, concealing the damage.
The second most common scenario is hard, framed tote bags made of smooth leather, such as those from Massimo Dutti or Celine. The bottom corners of these models always wear out. The friction there is enormous. To stop the wear, rub liquid leather into the abrasion in 3-4 very thin layers, allowing each layer to dry for at least 30 minutes.
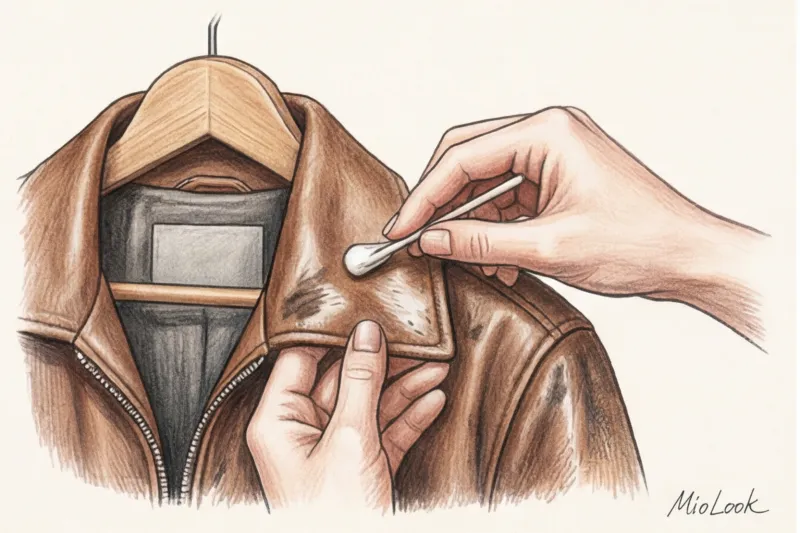
Jackets and coats are the most common victims of pet claws. Minor surface snags can be concealed in just 15 minutes: a drop of polymer, a touch of texture with a sponge, and the item looks classy again.
The biggest mistakes beginners make: when liquid leather ruins a garment
Here lies the most important thing that manufacturers keep silent about on their beautiful packaging. Liquid leather is not able to withstand strong tension. This is my main counterintuitive advice to clients: don't try to glue cuts at the folds with it.
If your leather pants have a rip at the knees or a crack at the elbow of your favorite biker jacket, the polymer will crack within the first day of active wear. A tension tear requires mandatory mechanical reinforcement from the inside (with reinforcing material) and stitching. Liquid leather is applied only at the very end, purely as a cosmetic top layer.
The second common mistake is using cotton swabs for application. The cotton fibers will quickly sink into the sticky polymer, and instead of a smooth surface, you'll get a "hairy wart" effect. Use only metal spatulas, toothpicks, or synthetic brushes.
And finally, the finish. Many people are surprised why the paint washed off in the first rain after a repair. Polymer filler needs to be fixed! Professionals always seal the repaired area with a clear sealer (a special leather varnish) in a matte or glossy finish.
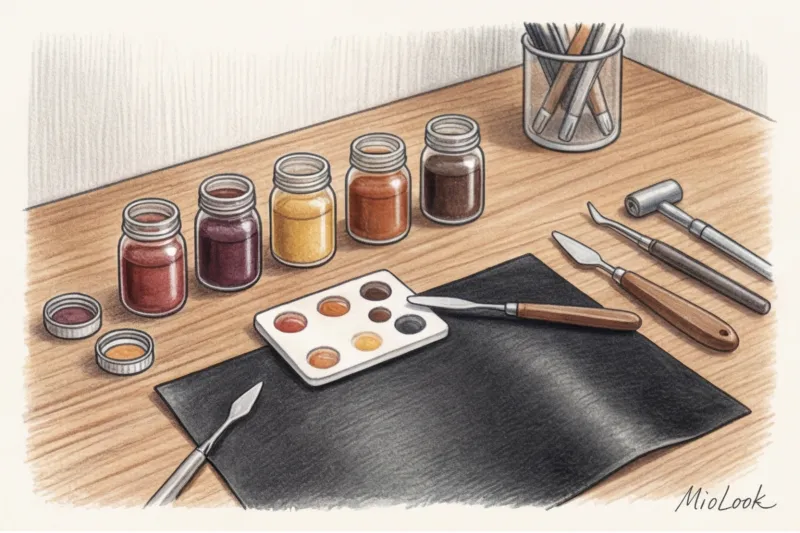
How to choose the right composition for home repairs
There are dozens of brands available on marketplaces, but not all are created equal. For a one-time repair of black shoes, a single tube of the desired color is enough. But if you plan to restore colored bags or complex shoes, invest in a basic palette of seven colors (like in painting, you can mix any shade from these).
Analyze the ingredients: look for mention of polyurethane resins. This is what provides the flexibility. Cheap acrylic alternatives quickly dry out and crumble.
Three signs of a quality product that I have identified for myself:
- Consistency: should resemble thick country sour cream, not runny water.
- Smell: A slight alcohol or chemical scent is acceptable, but there shouldn't be a pungent, toxic smell (like cheap Moment glue).
- Polymerization time: A high-quality composition sets in 15-20 minutes, but only gains full strength after 24 hours.
Add a rescued item to your digital wardrobe
Manage your belongings from your phone and stay on top of what you own with MioLook's smart categorization.
Try MioLookWhen to put down the tube and contact a restorer
Confidence in your skills is great, but knowing your own limitations is the sign of a true expert. There are situations where attempting a DIY repair will only increase the repair shop's bill.
I strongly recommend not to touch the product if:
- The gap is larger than 2 centimeters, and there is a clear loss of a piece of skin (a hole). Filler cannot fill the void; a donor skin graft is required.
- We're talking about exotic creatures: crocodiles, pythons, stingrays, and ostriches. Their scaly structure and unique patterns are impossible to reproduce at home.
- The product has a complex mother-of-pearl, metallized (gold/silver) or gradient (patina) coating.
- The bag's supporting frame is damaged (for example, the seal on the bottom is broken). Liquid leather is cosmetic and does not provide structural rigidity.
Mastering leather repair isn't about saving money (though it is). It's about respecting quality items and being mindful of your wardrobe. Don't write off your luxurious loafers or favorite bag because of an annoying scratch. With the right polymer, a toothpick, and a little patience, you can extend the life of your favorite items for years to come. And to ensure these items always form flawless outfits, you can always rely on digital wardrobe analytics.